Rin Deployment Guide
This document will guide you through deploying the Rin blog system to Cloudflare from scratch.
Prerequisites
- A GitHub account
- A Cloudflare account (free tier is sufficient)
- Approximately 10-15 minutes of your time
Deployment Steps
Step 1: Fork the Repository
- Visit the Rin GitHub Repository
- Click the "Fork" button in the top right corner
- Select your personal account, keep the default settings, and click "Create fork"
Obtaining Account ID and API Token
Refer to https://developers.cloudflare.com/workers/wrangler/ci-cd/ to configure the Cloudflare login environment variables required for GitHub Actions.
Account ID: Click on any domain you have bound. After entering, you can find the Account ID on the right side (you need to scroll down a bit).
Creating an API Token: Click your Profile icon in the top right > My Profile > API Tokens > Create Token, and select the Edit Cloudflare Workers template:
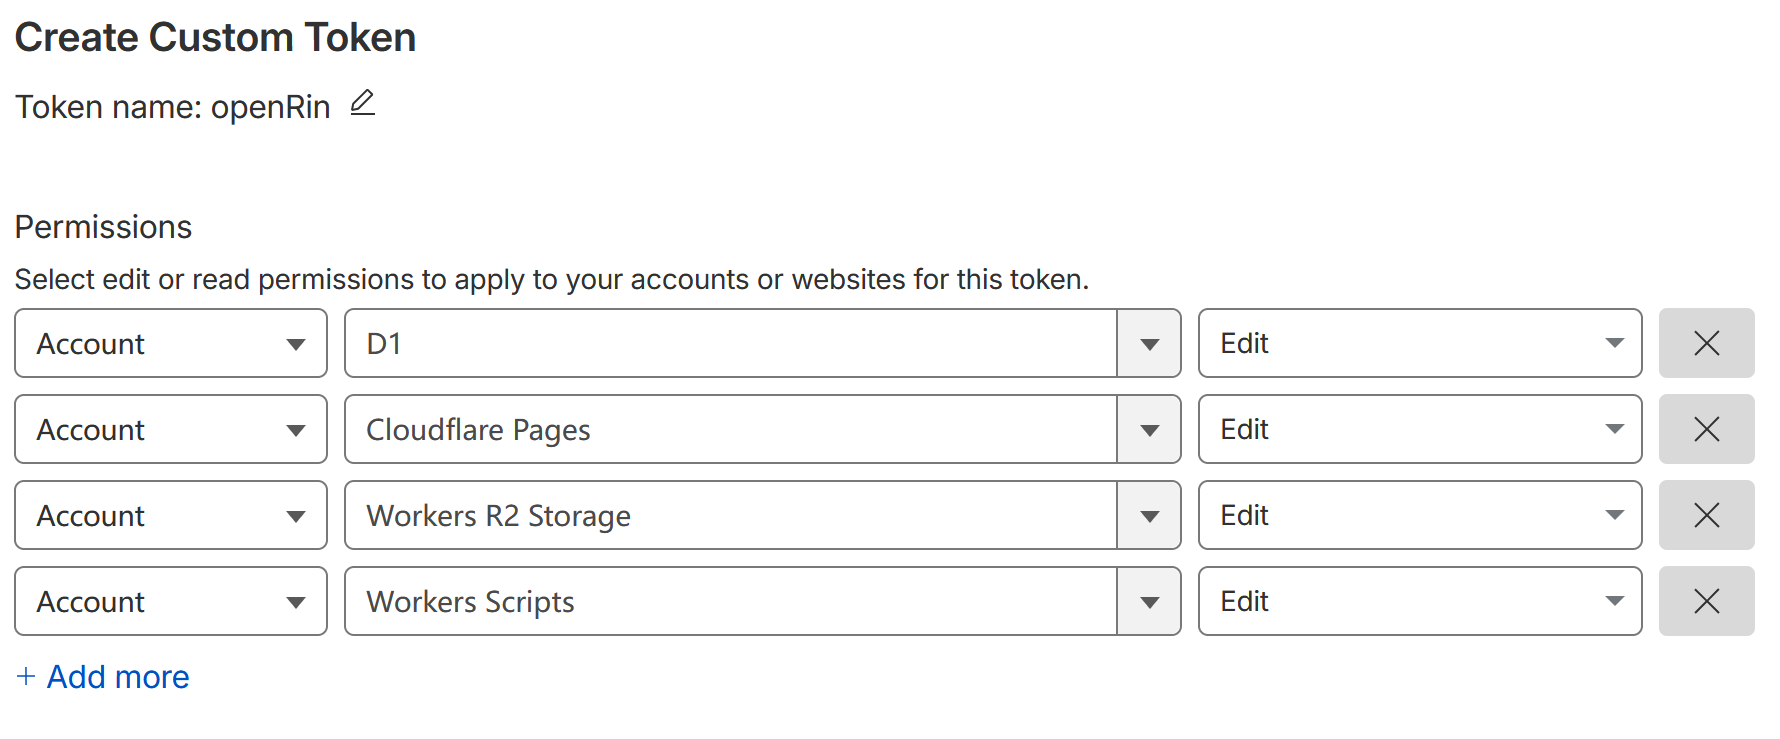
Save the token after creation.
Step 2: Configure GitHub Secrets
- On your forked repository page, click the "Settings" tab
- In the left menu, expand "Secrets and variables" and select "Actions"
- Click the "New repository secret" button to add the following secrets:
Required Secrets
Tip:
JWT_SECRETcan be any random string of any length, for example:MySecretKey123!@#
Login Configuration Secrets
Rin currently supports username/password login and GitHub OAuth login. You can choose one or configure both.
Username/Password Login (Recommended)
GitHub OAuth Login (Optional)
If you want to use your GitHub account to log in, please refer to the Advanced Configuration section to add OAuth configuration.
Tip: Username/password login and GitHub OAuth login can be enabled simultaneously. Users can freely choose their preferred login method on the login page.
Step 3: Trigger Deployment
- Go to the "Actions" tab in your repository
- Select the "Deploy" workflow on the left
- Click the "Run workflow" button
- Keep the default branch (main) and click "Run workflow"
The deployment process takes approximately 3-5 minutes. You can view the deployment progress on the Actions page.
Tip: The deployment script will automatically configure frontend environment variables; no manual configuration is needed. You can customize the site name, description, etc., in GitHub Variables (optional).
Step 4: Access Your Blog
After deployment is complete, you can access your blog through the following addresses:
- Frontend:
https://rin-client.pages.dev(or the name you set inPAGES_NAME) - Backend API:
https://rin-server.your-account-id.workers.dev
Step 5: First Login
- Visit the frontend page
- Click the login icon in the top right corner
- Log in using the
ADMIN_USERNAMEandADMIN_PASSWORDyou set in Secrets - After logging in, click your avatar to enter the Profile page, where you can modify your nickname and upload an avatar
Publishing Your First Post
- After logging in, click the "Write" button in the top right corner
- Fill in the article title and content
- Click the "Publish" button
🎉 Congratulations! Your Rin blog has been successfully deployed and your first post has been published!
Advanced Configuration
Custom Domain
- Log in to the Cloudflare Dashboard
- Go to Pages > Your Project > Custom Domains
- Follow the prompts to add your domain
Image Storage Configuration
Rin supports two storage methods: Cloudflare R2 (recommended) or S3-compatible storage.
Using Cloudflare R2 (Recommended)
If no S3 environment variables are configured, the deployment script will automatically attempt to use Cloudflare R2. You only need to set the following in GitHub Variables:
The deployment script will automatically construct the R2 endpoint and access host. If you want to use a custom domain for images, you can additionally set:
Using S3-Compatible Storage
If you need to use other S3-compatible storage (such as AWS S3, MinIO, etc.), you need to fully configure the following Secrets:
And the following Variables (optional):
GitHub OAuth Configuration
If you want to log in with your GitHub account:
- Visit GitHub Settings > Developer settings > OAuth Apps
- Click "New OAuth App"
- Fill in the application information:
- Application name: Rin Blog
- Homepage URL: Your frontend page address
- Authorization callback URL:
https://your-worker-name.your-account-id.workers.dev/user/github/callback
- After creation, obtain the Client ID and Client Secret
- Add to GitHub Secrets:
RIN_GITHUB_CLIENT_IDRIN_GITHUB_CLIENT_SECRET
Troubleshooting
Deployment Failed
- Check if GitHub Secrets are configured correctly
- View the Actions logs for detailed error messages
- Ensure your Cloudflare account has permissions for Workers, Pages, and D1
Cannot Log In
- Confirm that
ADMIN_USERNAMEandADMIN_PASSWORDare set correctly - Check Worker logs for authentication errors
- Clear browser cache and try again
Database Migration Failed
The deployment script will automatically run database migrations. If it fails:
- Manually go to Cloudflare Dashboard > D1
- Find your database and click "Console"
- Manually execute the migration SQL (refer to files in the
server/migrations/directory)
GitHub Actions Workflows
The repository includes several GitHub Actions workflows that automate testing, building, and deployment:
CI Workflow (ci.yml)
Runs on every push and pull request to check code quality:
- TypeScript type checking
- Code formatting verification
- Build verification
Test Workflow (test.yml)
Runs comprehensive tests on every push and PR:
- Server tests: Unit and integration tests using Bun
- Client tests: Component tests using Vitest
- Coverage report: Uploads coverage to Codecov
Build Workflow (build.yml)
Runs on pushes to main and develop branches:
- Builds both frontend and backend
- Validates build artifacts
- Triggers deployment workflow on success
Deploy Workflow (deploy.yml)
Triggered manually or by build completion:
- Deploys frontend to Cloudflare Pages
- Deploys backend to Cloudflare Workers
- Runs database migrations
PR Preview
When you create a Pull Request, a preview deployment will be automatically generated so you can test changes before merging.
Updating Your Blog
When a new version is released:
- Click "Sync fork" on your forked repository page
- Click "Update branch"
- Deployment will be triggered automatically
Or update manually: